Pages

Wednesday 15 December 2010

Stylish Dress Book vol 1- How to make a tunic dress V


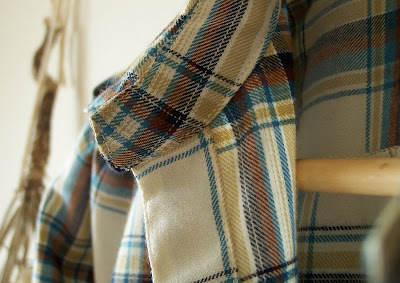
I managed to sew up the next dress from my Japanese sewing book a few weeks ago, dress V which is the shirt dress with a collar and pocket. I found sewing this up was much like the first dress although I did find sewing the collar a tad tricky as I've never actually sewn a garment which has a fold over collar. I did however manage to work it out by looking at an existing shirt I had which had a similar collar.

I made a few alterations to the pattern which I thought would give it a slightly more feminine touch to it. I noticed on the original pattern the shape of the shoulder is quite straight and was of a dropped nature so I raised the shoulder line and added gathers. I also added gathers to the cuff. Below is how I did these alterations.

For this dress I chose a lovely soft cotton plaid fabric (about 1.7 metres). Matching up the lines wasn't too bad with this pattern, it just took a little extra time to make sure they were in line.

The alterations

Raising the shoulder
Trace your sleeve pattern onto tracing paper. To give the shoulder a raised look you'll need to increase the head by about 2cm. Mark 2cm above the very top of the sleeve and then draw a gentle slope, starting from the back balance point mark. This line will continue over the top of the sleeve head and to finish at the front balance point mark.


This is your new sleeve head. Now you've altered the sleeve you'll need to take 2cm off of the front and back bodice piece. This is to ensure that the sleeve will comfortably fit the sleeve hole.
Mark 2cm in from the end of the shoulder on the front bodice piece. Start from that mark and draw a gentle curve sloping inwards until you reach the sleeve line where the balance point is. Then cut off the area you've just marked.
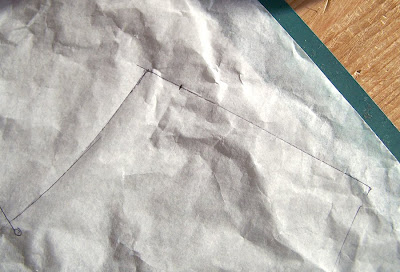


Do the same with the back bodice piece and you're done.

This technique of raising the shoulder is really useful when you require a gathered shoulder head. Raising the shoulder allows the gather to sit slightly in of the end of the shoulder which aesthetically looks better.

Gathers

So onto creating those gathers. At the bottom of your sleeve measure the desired height of the cuff you want, I think I made mine 5cm. Mark across and cut this amount off. This is your cuff- remember to add seam allowance to the top edge of your cuff after pinning it to your fabric.

Starting from the top centre line on your new sleeve piece draw 5 lines, 2cm apart. Cut down along these lines.


Number your strips and then spread them out leaving spaces of the desired amount (I did 2cm). Stick these all down on top of a new sheet of tissue paper, tidy the top sleeve curve by re-drawing the line. Go onto cut around the whole sleeve shape.
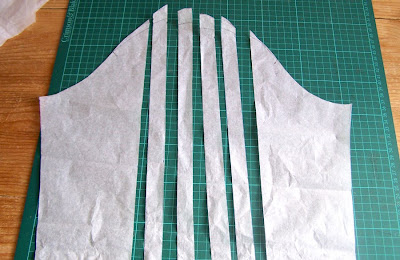

This will be your new sleeve. Your gather line will be from where the first strip starts to where the last cut strip ends. Now you're ready to sew the rest of the dress.

Step 3. Sew pocket

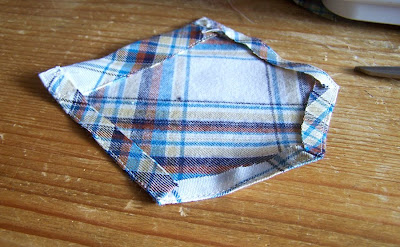
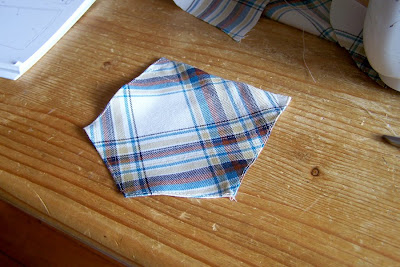
Take your pocket and fold in and press the seam allowances according to the image in step 3. remember that the top edge folds over twice, once by 1cm and again by 1.5cm making a total of 2.5cm. Sew down your top edge, 2mm from the edge.


At this point I actually sewed all the edges down as shown in the main image on page 76 and then sewed the pocket to the dress front. However the proper way would probably be to just go straight ahead and sew the pocket onto the dress without sewing the edges down first. by the sewing the edges down first it did help me to neatly sew the pocket to the dress more easily, especially as the pocket it cut on the bias but it's up to you which way you do it!


There are quite a few steps to this tunic so I'll be posting them up in stages! Stage two coming soon...

Thursday 9 December 2010

Featured Interview with Trina Holden


I just wanted to say a big thank you to friend and fellow seamstress Trina Holden over the pond for featuring me on her lovely blog All that is Good as part of her Fabulous Fridays item. I'm looking forward to following the other interviews in the series as it's great to get to know about other like minded seamstresses who love to sew!

Tuesday 7 December 2010

Winter Collection on main website!


Just a quick post to let everyone know the winter collection is now up on the main website phew! Finally we managed to get everything ready and online before Christmas. There are quite a few one off items like the jersey scarves and a couple of the ties so once they're gone, they're gone! Do take a look!

Monday 29 November 2010

Mouret dress: Work in progress 1

Just a quick post to show how the dress is coming along. Here are photos of the poly satin fabric and of the lining I have nearly finished sewing.


Because we couldn't locate lining which matched the self fabric perfectly I've made facing pieces from the self fabric for the neckline and I'm wondering whether to do the same for the edge of the sleeve too.


Once this part is finished it'll be onto the main part of the dress and interfacing the parts of the dress which come under a lot of strain and are prone to stretching. Lots to do and only 4 weeks to go till the wedding event!

Monday 22 November 2010

Winter Collection on Etsy


Finally the winter collection is online! However our main website hasn't been updated just yet. In the meantime the winter collection can be found here on etsy. There are still a few items to be included but most of the garments and accessories are in the shop. Enjoy!

Monday 15 November 2010

Mouret dress: Fitting number 3


Today we had the last fitting for the Mouret inspired dress. I forgot to take photos of the final dress fitting and to mention how the second fitting went but there were only a few minor alterations to be made which I think I've got in hand. These included altering the toile to accommodate swayback, widening the hip area and curving in the princess seam at the neckline. I've really learnt a lot about the numerous subtle alterations which have to be made in order to achieve a really great fitting dress and it makes me have even more of an appreciation for couture fashion designers who create perfectly fitting garments for their clients and do it all by by hand!

We also bought the fabric (a lovely turquoise poly satin) and notions we need for the final dress so I'm just about ready to get going! The last thing I need to do is create extra pattern pieces for the lining pieces and the areas of the dress which are interfaced. I'll document the process of the final make up of this dress -I'm looking forward to seeing the final result! I don't regularly sew with satin fabrics so if anyone has any tips about working with this type of slippery satin fabric I'll be happy to hear them. Off to work I go!

Saturday 13 November 2010

Make all your clothes for a year!


I've just come across this amazing art and research project which involved fashion designer Natalie Purschwitz making all her clothes, socks, shoes, coats, jackets, hats, bathing suits, accessories and even underwear for a year! Yes a year! while trying to live her normal day to day life. She set herself two simple rules:

1. My entire wardrobe will be made by me out of new or used materials.
2. I don't have to make my materials, however, I will aspire to do so whenever possible.

She has documented the project on her blog Makeshift. While undertaking the project Natalie continued to run her own clothing line called Hunt & Gather which features her beautifully designed clothing and accessories.


(pictures courtesy of Makeshift)

It's great to see all the wonderfully interesting garments and shoes she has created over that 365 day period. What a great inspiration to encourage us to make more of our own things in this throwaway age! I'm really interested in how she made her shoes, I've always wondered how easy that would be to do and also find the appropriate tools to do so. I may just have a try sometime soon. It would be great to set a similar creative project for myself one day- maybe not making my own underwear, but perhaps just seeing whether I could make all the outer garments I needed to wear? Maybe one day. But in the meantime I'm totally inspired to try and make rather than buy more of my own and my family's clothing and accessories.

Monday 8 November 2010

Stylish Dress Book Vol 1- How to make a tunic


I bought this amazing Japanese pattern book The Stylish Dress Book Vol 1 awhile ago but I've never made time to make any of the lovely garments which feature inside. The Stylish Dress Book has been described as the 'The mother of all Japanese dress books' on other blogs and indeed it is!.


There are plenty of photos and reviews about this great book online but I too would love to share my experience of making up a tunic from this book - and post some how-to instructions.


All the instructions in this book are in Japanese however there are clear illustrations which explain the process of making up each garment. Saying that, I wouldn't recommend this book to beginners as it assumes that you already have knowledge of various sewing techniques e.g. button holes, attaching bias binding and hemming. I'll try and create as many links to sites which explain these techniques if extra help is needed.

So I decided to make Dress G (below), also I've not seen an example of this tunic elsewhere on the web so all the more reason to try it out.
The instructions below are just my own account of how I've made this tunic, I hope they will be of help to those who have this book but haven't yet made something from it. Let me know if I've left anything out or a particular point needs more clarification! If you don't have the book and you like the style of the clothing I can recommend it to you. I bought mine from pomadour a lovely etsy shop for a good price.


Firstly you'll need to trace pattern G onto pattern paper or tissue paper. The pattern sheet will look a bit daunting at first but just have look for all the lines which are marked G. There are five pattern pieces altogether. (Note: I personally couldn't find the second longer bias pattern piece which is for the neckline so I doubled the length of the bias pattern piece which is used for the sleeve. There might have been a note about this in the book but since it's all in Japanese I couldn't tell!)


Lay your pattern pieces on your fabric and mark your 1cm (or 1.5cm) seam allowance (Remember none of the patterns in the book have seam allowance included!!)
I chose to use a lightweight spotted cotton lawn with embroidered flowers, not very wintery but I really love it.


Also remember to copy all markings that are on the pattern to the fabric. I like to thread mark (sewing a loop through one layer of fabric) these marks instead of using tailors chalk- it takes slightly more time but it's well worth it when you come to matching up the pieces. I marked the front placket area which chalk.


Cut out your pieces. Then give them a quick iron and lay all aside accept for the front bodice piece. On your front bodice piece you are going to cut down the centre front line, and across both left and right until the specified markers. So your cut line will look like an upside down T. Now you will make your front button placket.

Step 1- As shown in the first illustration in your book you'll need to fold in twice (by 2cm), either side of the centre front line you've just cut along as shown below.


And then sew along the edges like so...


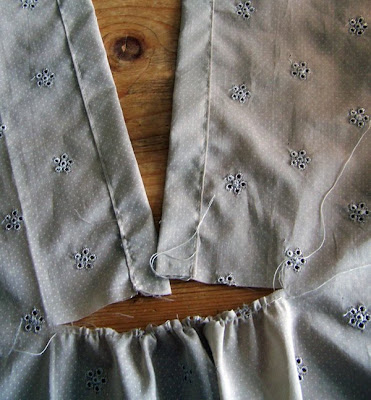
Step 2- Now you are going to create the gather below the button placket.
Sew a basting stitch (the longest stitch on your machine) 0.2 cm from the line you cut along the bottom (when cutting the thread at the end of stitching this line make sure it's long enough for you to hold). The red lines indicate the line you will sew along. The white marks indicate the chalk marks I've made which stand for the outer lines you will follow when sewing up the hole.


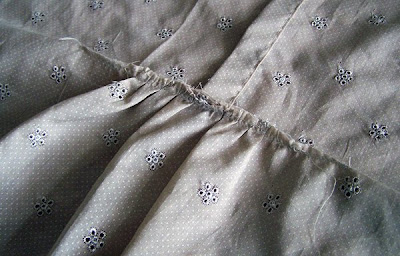
To create the gather pull the threads sticking out at each end until the button plackets overlap as shown in the illustration. It should look something like the photo below.


Overlap the plackets and pin in place. Now you are going to sew to close up the space in between the gather and placket. Pin (and baste stitch if easier) the top edge of the gather and the bottom edge of the placket like so.


Now sew long the marks you previously made starting from one end until you have completely closed the space.


And there you have your basic gathered placket front!


Topstitch 0.2cm above the front seam line making sure your seam allowance is neatened and facing upwards.

Then sew a reinforcing stitch 0.5 cm above the front seam line on top of the placket opening. Remember to remove your thread marks!


Now you can sew your bodice front piece to you bodice back piece. Serge/neaten and press all your seams. Top stitch your shoulder seams.

Step 4- Create the gathers at the neckline and back bodice piece. Create these gathers in the same way you did the front seam gather but stitch a second basting stitch very close to the first. this will help you to control the gathering when you pull the threads.


Prepare your bias binding pieces and pin the binding onto the neckline leaving 1cm protruding out after the placket line at each end of neckline.


Sew your binding down. Carefully press the bias bound neckline to give it a nice finish.


Step 5- Sleeves
Sew your sleeve ends together, press and neaten your seams.


Step 6- Sew the side seams of the main bodice together. Pin and sew your sleeve onto the main bodice piece and top stitch the seam (on the bodice side)


Step 7- Gather the sleeve ends and sew on the bias binding in the same manner as the neckline.


To finish the sleeve cuffs make sure you fold one end back by 1cm and place the fold line in right next to the seam line of the sleeve. Look at illustration 7 for clarification and the photo below. then place the other end on top of the other and sew down your binding. Then proceed to fold over and finish your binding.


You're nearly done!!

Step 8- Sew your hem. I serged the edge of the fabric and then turned it up (and pressed) by about 1cm. Then I sewed the hem down from the right side.


The last step is to sew your buttons and buttonholes. I forgot to take picture of this but if you need help visit here.

And there you go! A wonderful tunic! I wanted to add a bit of shape to the waist area as the tunic itself is on the baggy side. I simply sewed on two long narrow pieces of tape made from the same fabric and then added a little button detail and voila!


I'm really happy with the result and I want to try the same pattern but in a warmer fabric, perhaps a lightweight wool. I also want to try Dress V which is a shirt dress. It has the same placket front but is a little longer and also seems to be slightly more fitted than dress G. It also has a collar which I prefer as a neckline.


If any one has any questions about making up this tunic, if I can help I'll be happy to do so!
Happy sewing!


Related Posts with Thumbnails