Pages

Tuesday 31 August 2010

Burda tunic into skirt and apron

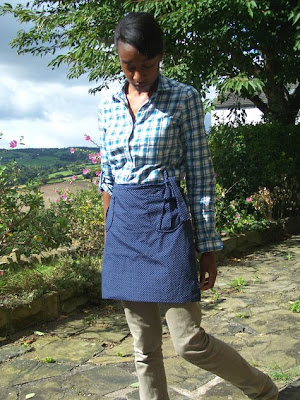
Here are pics of an apron remake I underwent when I made a major mistake when making up a maternity dress. I happen to find a great free tunic pattern (E971) on the Burda World of Fashion website which had a simple rounded yoke and a easy fitting bodice area- perfect for my ever growing bump. I made quite a few of these dresses, mainly using jersey fabric but I wanted to try a version using a lovely navy and white dotted fabric I had bought from a nearby fabric shop. However I made a major mistake when cutting out the fabric and alas when I went back to see if they had any more- they were sold out!

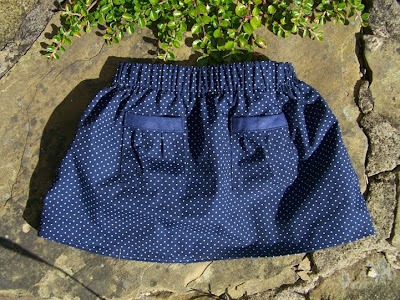
Anyway (like many unfinished projects I have), I placed all the remaining pattern pieces I had cut into my fabric cupboard until very recently. I still really loved this fabric so I decided to make an apron and a nice little skirt for Niah, and here are the results.


Niah's skirt was a really simple rectangle shape which has been gathered at the top with elastic.
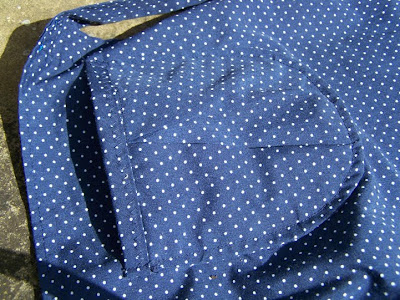
I included little square pockets with a mini gather at the middle and bias bound the top with plain navy linen. I love how you don't need very much fabric in order to make a nice simple piece of clothing for your little one. I'm hoping to use up some of the smaller pieces of nice fabric I have on clothes for Niah. My apron was also a very simple rectangle shape, with triangular box pleat pockets.


Friday 27 August 2010

Burdastyle Book


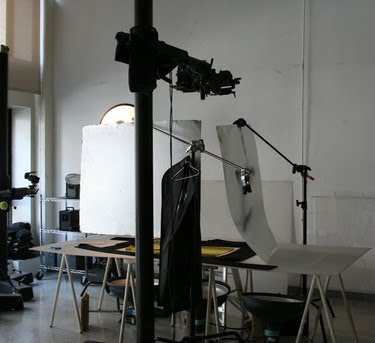
I'm getting excited! Burdastyle has just posted some behind the scenes photos of the shoot they're having for their forthcoming sewing book. I've had the privilege of contributing a bag creation for the book which is going to be published next year. I was asked to design a variation bag pattern from a pattern Burdastyle provided. I then had a few weeks to design and make the bag and send it off for the photo shoot. I can't wait to receive the final book!

Wednesday 25 August 2010

Make do and mend

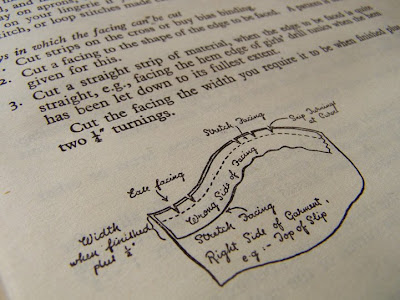
I've come by a bit of a family heirloom! The Book Of Good Housekeeping first published in 1944. A friend of mine lent me her copy which I think belonged to her grandmother. It's quite an amazing book which is packed full of info about how to run your home in the most economical way. It was written in an effort to help those who were due to leave their National Service and set up their homes after the world wars.


This book covers so much ground- I don't think there is an equivalent book to it now. It tells you how to choose a house, take care of clothes, budget, write shopping lists, buy cuts of meat, how to store food, how to look after your pets, good ways to organise your kitchen, how to repair things and it even instructs you in how to train your maid!

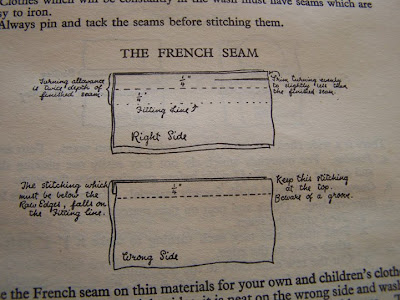
It also has a great little section about dressmaking, a bit like the booklet Make Do and Mend, which was distributed during the second world war. This section of the book tells you how to choose and cut the right fabric, make simple french seams and repair worn garments. The instructions given are quite easy to understand even though the illustrations are few and the lovely joined up handwriting is not the most legible of typefaces.


All in all a great little (but comprehensive) book which seeks to encourage families to reduce waste and promotes the recycling and re-use of all the things we consume and use each day.
I might just have a look for my own copy.

Monday 23 August 2010

All things nice...


I recently stumbled upon Creaturecomforts.com - a great site, with such a wealth of inspirational photographs. Check out all the lovely things which inspire Ez. Pure creative bliss.

Saturday 21 August 2010

Dry stuff


I love this time of year when certain plants start to dry out after the summer time. Some dry badly, and others dry beautifully like poppy heads and certain leaves. The honesty plant, when dried out produces a brilliant shiny opal colour . Here are some pics of plants i've gathered from our garden. I think they make lovely pieces to have in the house.

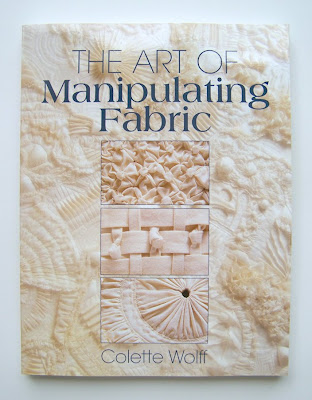
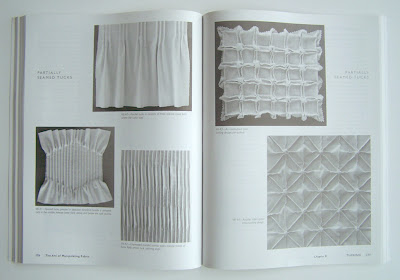
Manipulating fabric book

Here are some pics of this great book about manipulating fabric. It was given to me for my birthday by my lovely husband and i'm thoroughly enjoying it! It explains how to gather, ruffle, twist and tie fabric in more ways than I ever imagined, I'm longing to spend a day just try all these techniques out. You can buy it here.


Friday 6 August 2010

Jam Making


To continue on from my first post, the other day I managed to pick lots of blackberries (and cherries) from various bushes along a country road nearby. I decided to try some jam making!. I'm no expert at jam making and my last batch of jam didn't set well but I did want to see whether I could recreate similar results to the very first batch of strawberry jam I made- it set beautifully and tasted really good too.

Here is the recipe I used for making the blackberry jam (which set wonderfully too)
It's really easy and you only need a few ingredients, i've used the basics.
Happy jam making!

p.s the recipe is only for 2 jars (we don't eat a lot of jam so I don't need to make huge batches)

You will need:

1 lb Blackberries
13 oz Sugar (just the normal stuff)
Juice of 1 medium sized lemon
A tall cooking pot
2x glass jars
Some greaseproof paper (for the underside of the jar lids)


Firstly, you'll need to wash out your jars and sterlise them by placing them in a warm oven for 5 mins (about 140 degrees). Don't do this too far in advanced as you jars need to be a bit warm when you pour the jam into them.


2. Cut small circles from the greaseproof paper, the same size as your jar lids and keep them by the side.

3. Wash and gently dry your blackberries (I added two strawberries to get the weight up to 1 lb), place them in the pot along with the sugar and put on a gentle heat for about 5 mins or until all the sugar has dissolved ( make sure there are no sugar crystals left by dipping a wooden spoon into the mixture and looking at the back side of the spoon to see whether any crystals remain. Then add your lemon juice


4. Now turn the heat up to the highest and let the mixture boil for about 5-8 mins so it can reach the setting point. The bubbles will rise quite high (make sure it doesn't bubble over).


5. Keep an eye on your mixture as you want to make sure you take the pot off the heat as soon as it has set. After the 5-8 mins take the mixture off the heat. Leave to cool for a couple of minutes. It has set if the mixture resembles a thick gloopy consistency, it should look very much like warm jam.

I've also read that you can place a small spoonful on a plate which has been placed in the freezer for 15 mins or so, and if the jam wrinkles when pressed then it has set. this method has never really worked so well for me but I think I have tried it once before and the jam didn't wrinkle but it was very thick and didn't slide off of the cold plate easily either, the jam was set though.

If the jam hasn't set then perhaps add a bit more lemon juice (half a lemon) turn the heat back up for 2 mins and check again.


6. Now you can pour your jam into your warm jars. Once you've done this, place your paper circles on top (this stops bacteria from getting in) and put the lid on the jars!
And there you have it, scrummy blackberry jam!


Tsumori


Lovely photos and clothing from Korean clothing brand Tsumori.

Wednesday 4 August 2010

a new start...


Welcome again and thanks for visiting my blog!. In the next few days I hope to post images of available fabrics for our summer collection of skirts which you can view here.
But first, some jam making adventures...
Related Posts with Thumbnails